Hi there! 🌟
I'm so excited to guide you through this process. I promise it’s simple, and we’ll have you all set up in no time! Let’s get started:
Step 1: Log in to Your Facebook Account
Start by logging into your Facebook account as you normally do.
Step 2: Access Meta Business Suite
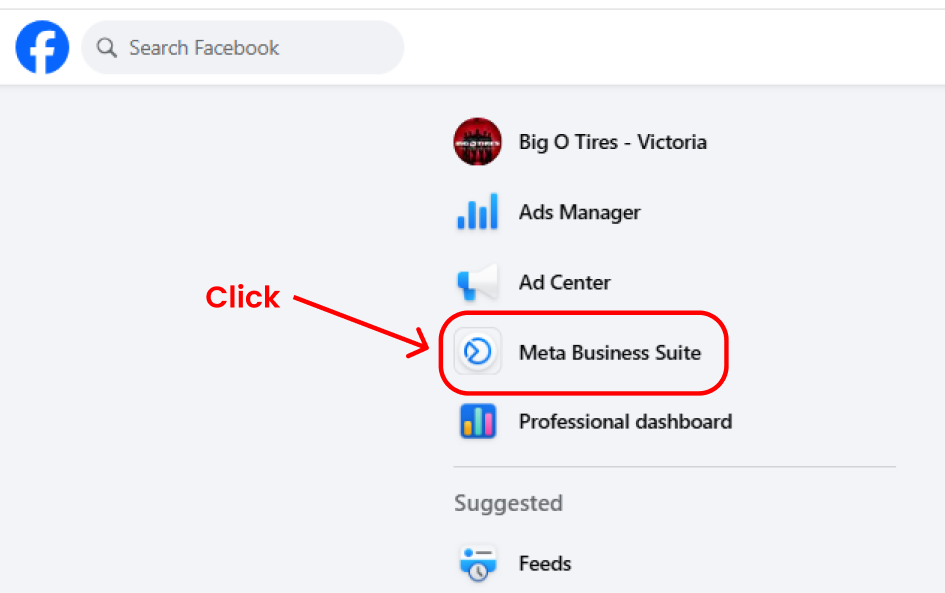
- On the left-hand side of your Facebook interface, you’ll see a section labeled “Meta Business Suite.”
- Click on it to open the dashboard (see the image above for reference).
Step 3: Open Business Settings
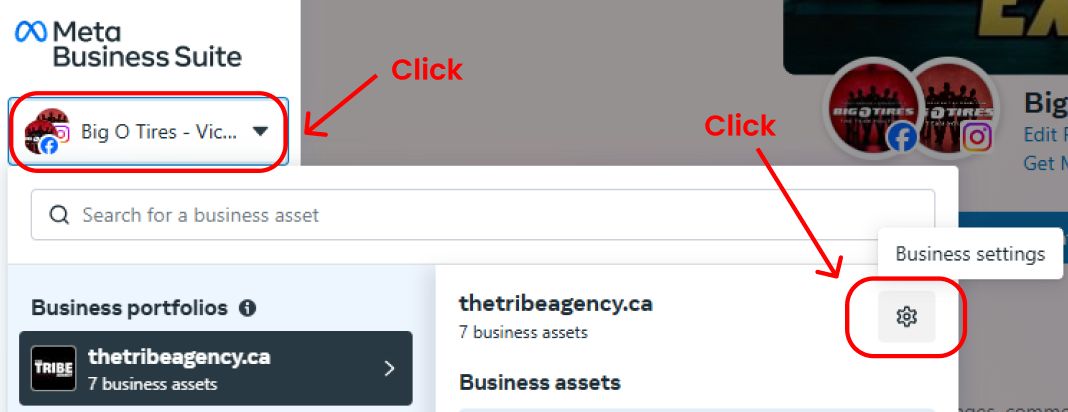
- Once in Meta Business Suite, click the dropdown menu at the top (where your business name is displayed).
- Select the gear icon (⚙️) labeled “Business Settings.”
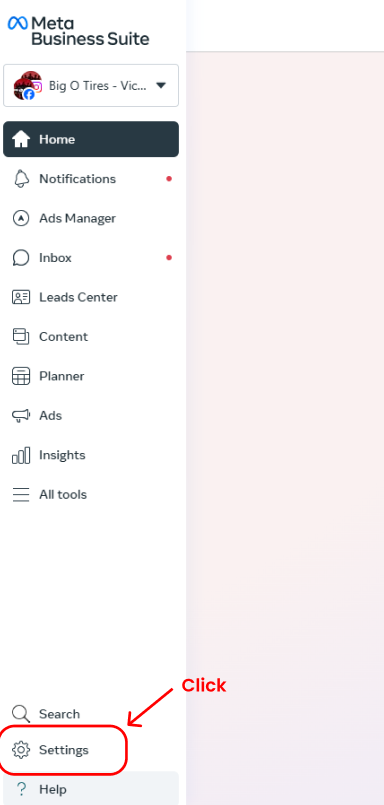
- Alternatively, you can also find "Settings" at the very bottom of the menu on the left-hand side.
Step 4: Invite People
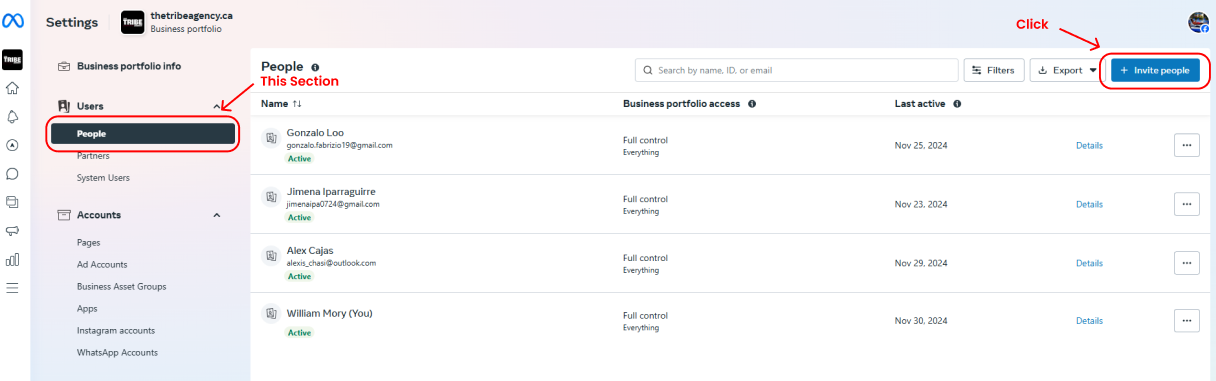
- Navigate to the “People” section on the left menu under Users.
- Click on the blue + Invite People button at the top right of the screen.
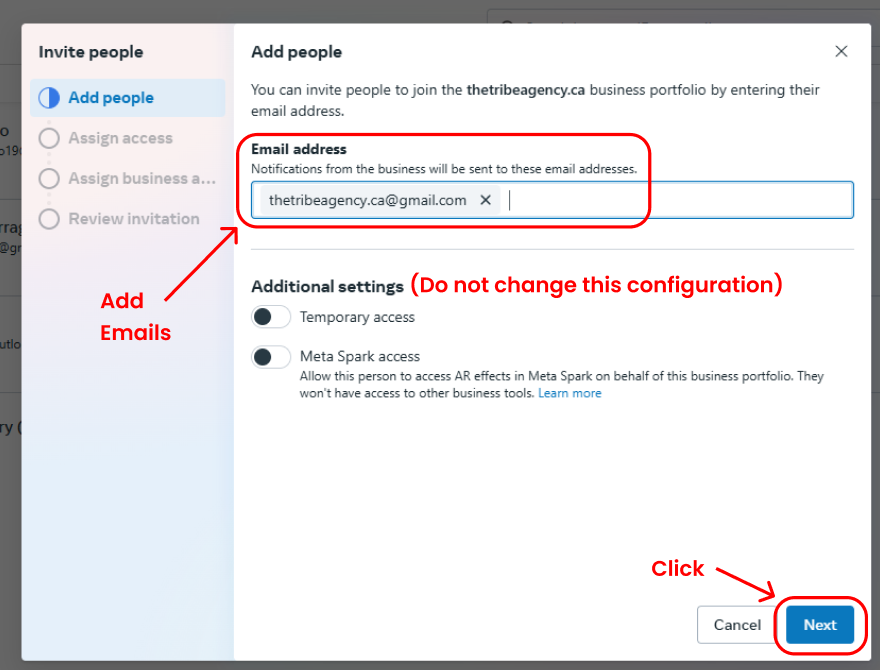
Step 5: Add Emails
- In the “Add People” section:
- Enter the email address we’ve provided for you.
- Double-check it for accuracy.
- DO NOT enable the "Temporary Access" or "Meta Spark Access" toggles.
- Click Next to proceed.
Step 6: Assign Access Permissions
- Under “Assign Access”, you need to:
- Enable “Apps and Integrations.”
- Enable “Full Control – Everything.”
- Click Next when done.

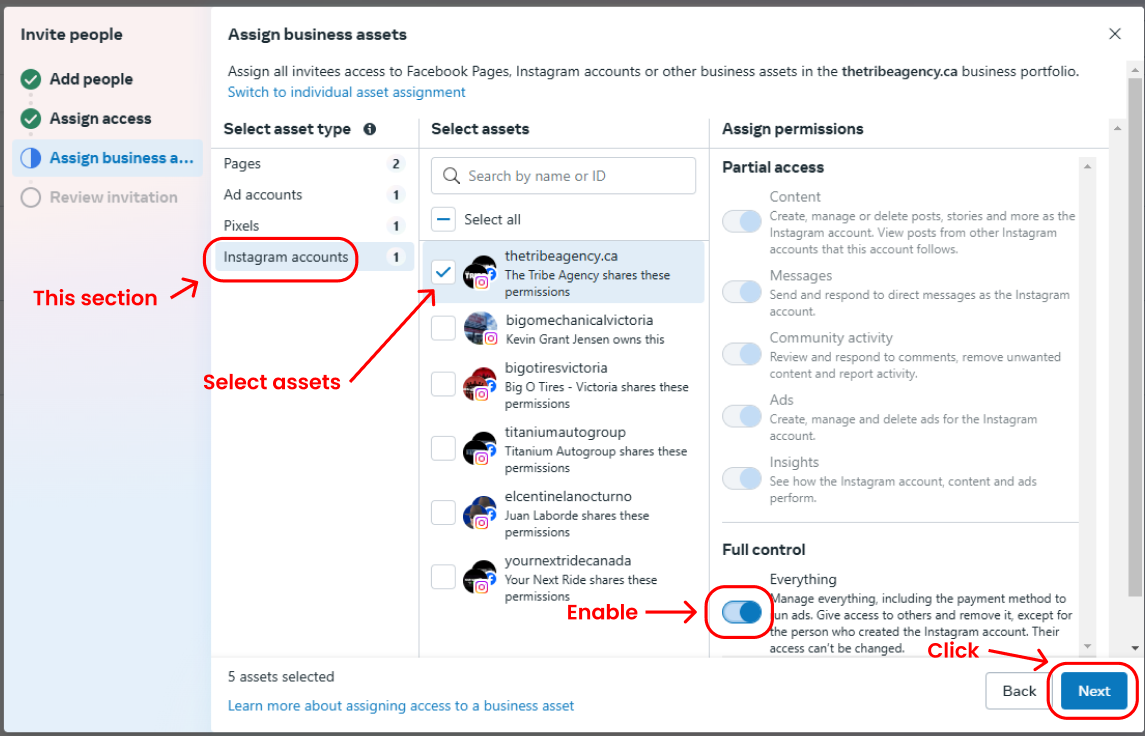
Step 7: Assign Business Assets
Now it’s time to grant access to specific assets. We’ll walk through each type:
-
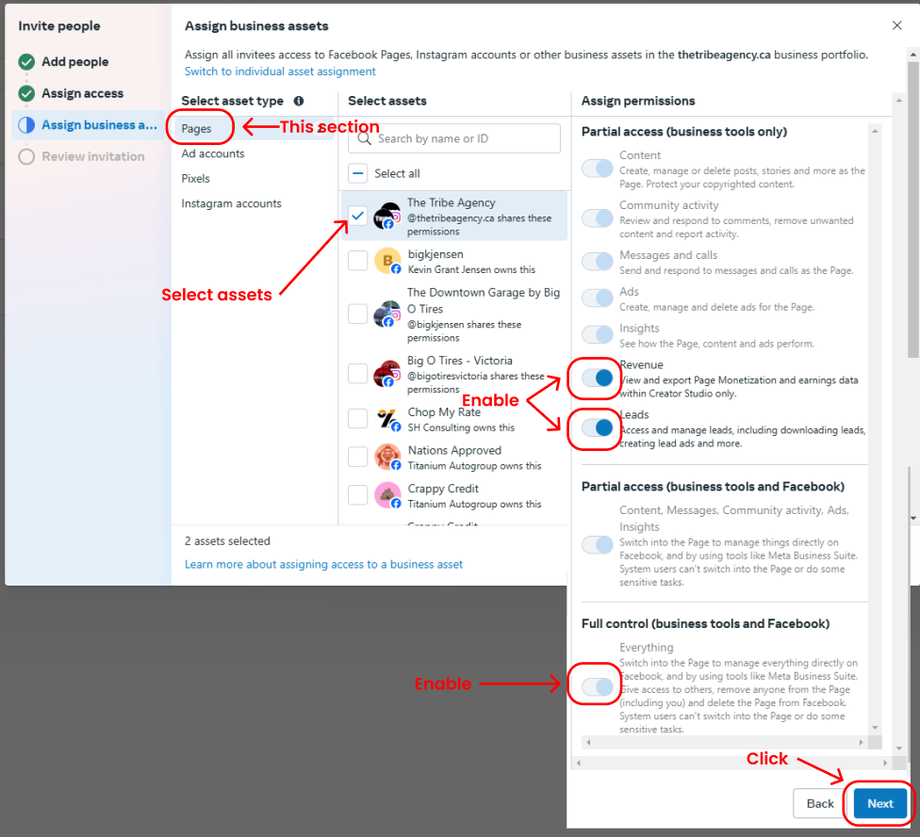
Pages:
- Select the pages we’ll be managing for your brand.
- Enable permissions for:
- Full Control
- Revenue
- Leads
- Click Next.
-
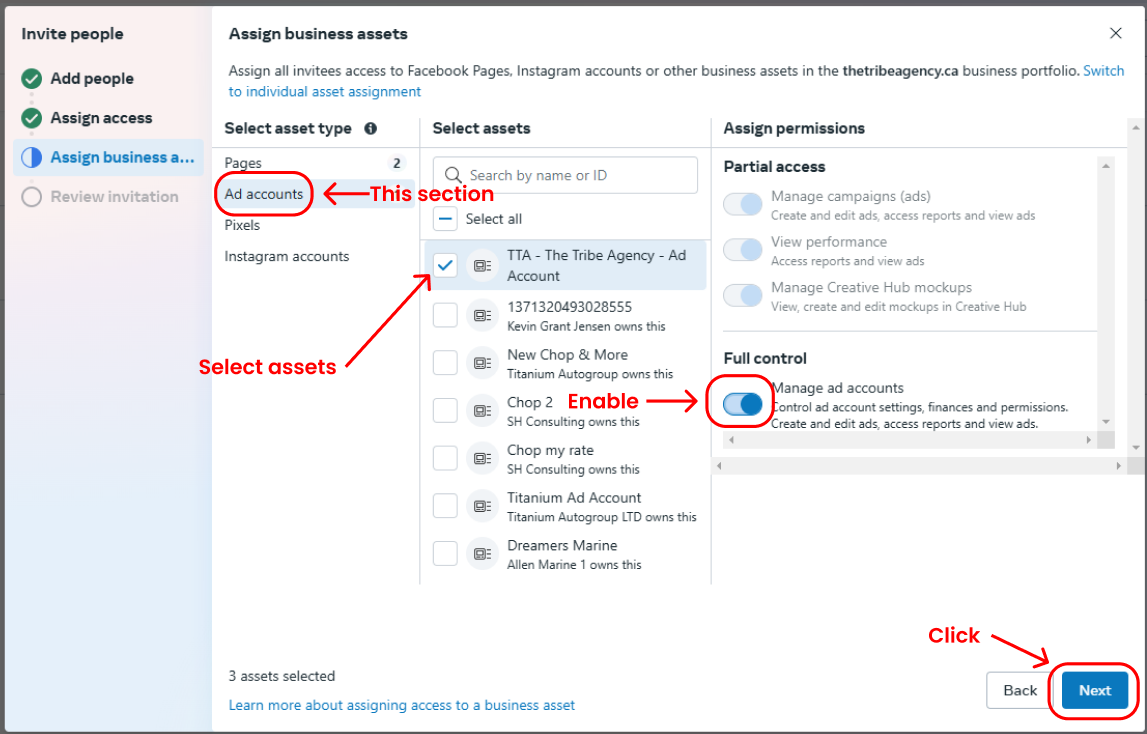
Ad Accounts:
- Select the Ad Account that we’ll manage.
- Enable Full Control.
- Click Next.

-
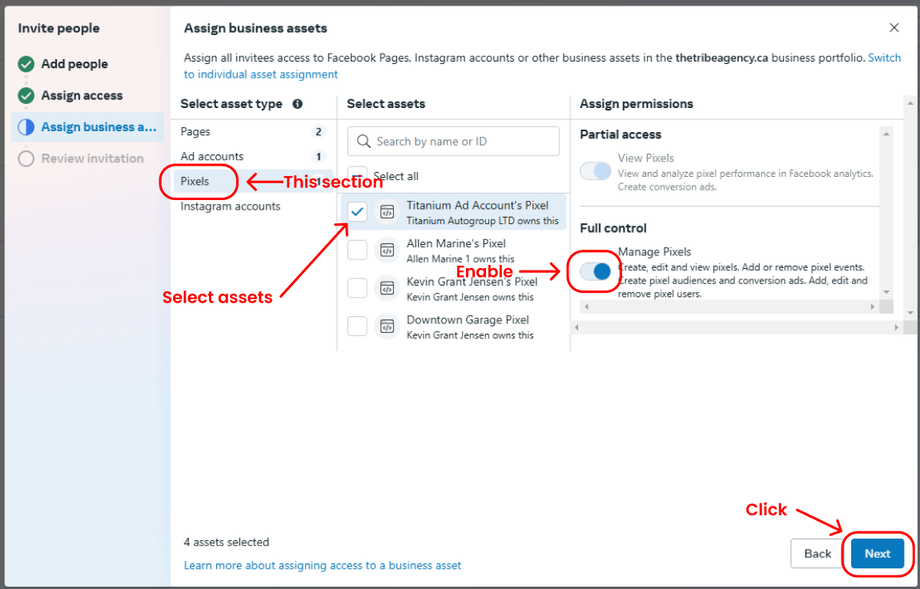
Pixels:
- Select the Pixel associated with your page.
- Enable Full Control.
- Click Next.
-
Instagram Accounts:
- Select the Instagram account connected to your page.
- Enable Full Control.
- Note: This access allows us to publish on your account through Meta. To optimize the account fully, we’ll also need your Instagram username and password.


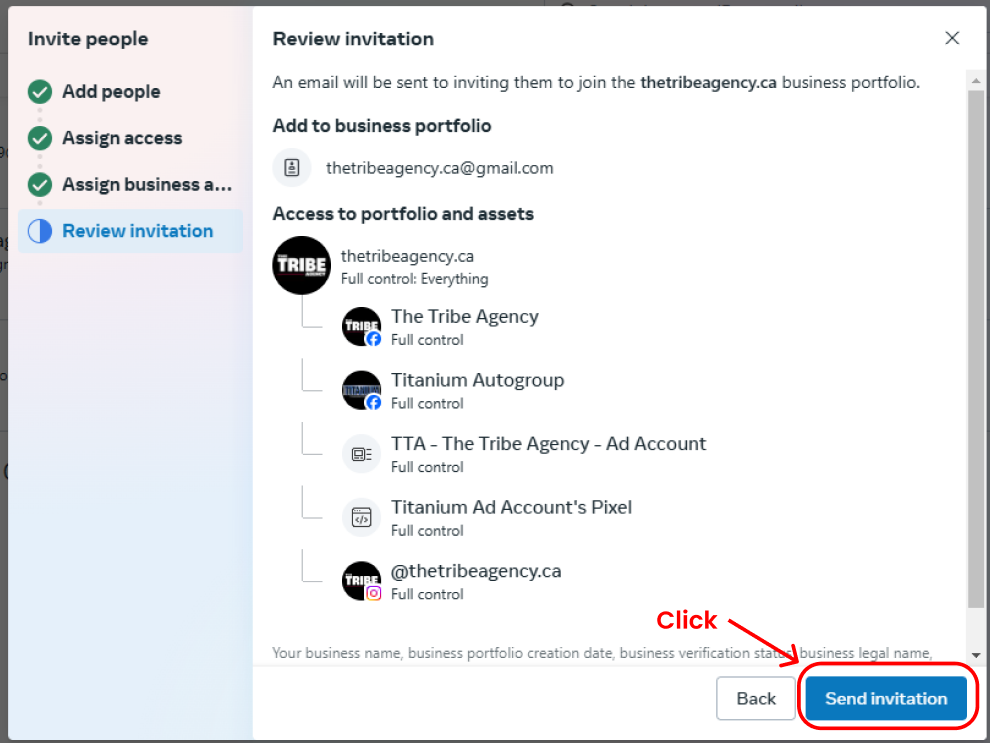
Step 8: Review and Send Invitation
- In the “Review Invitation” section, double-check the details.
- Once confirmed, click Send Invitation to complete the process.
That’s It! 🎉
You’ve now granted us the necessary access to your Meta Business Portfolio. If you have any questions or get stuck, just let me know—I’m here to help.
Thank you for trusting us with your business growth. Let’s make magic happen! 🚀✨